Local pricing for Beehiiv newsletters
Link Beehiiv, set prices by country, and turn more readers into paid subscribers.
Create dynamic pricing now
How to integrate Beehiiv
with ParityDeals
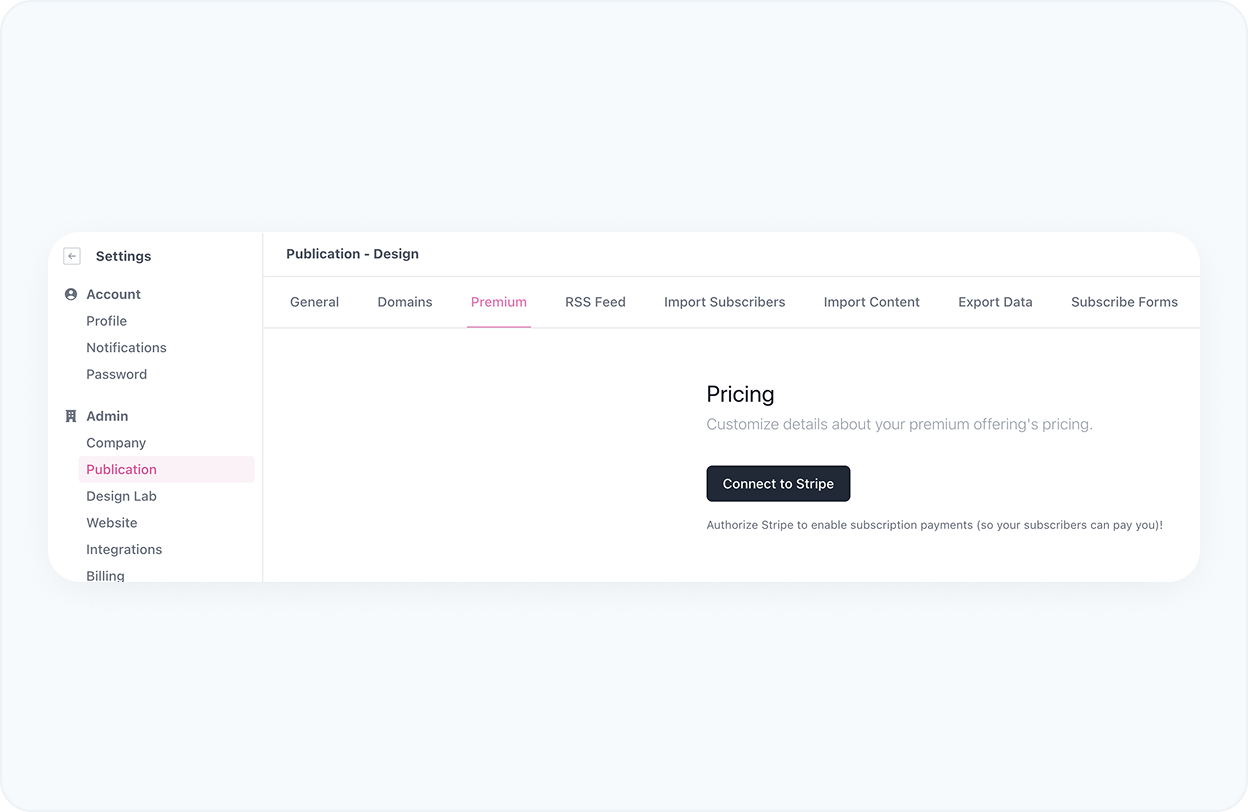
STEP 1
Connect Beehiiv with your existing Stripe account
Go to your Beehiiv Setting > Publication > Premium and connect your Stripe account with your Beehiiv account.
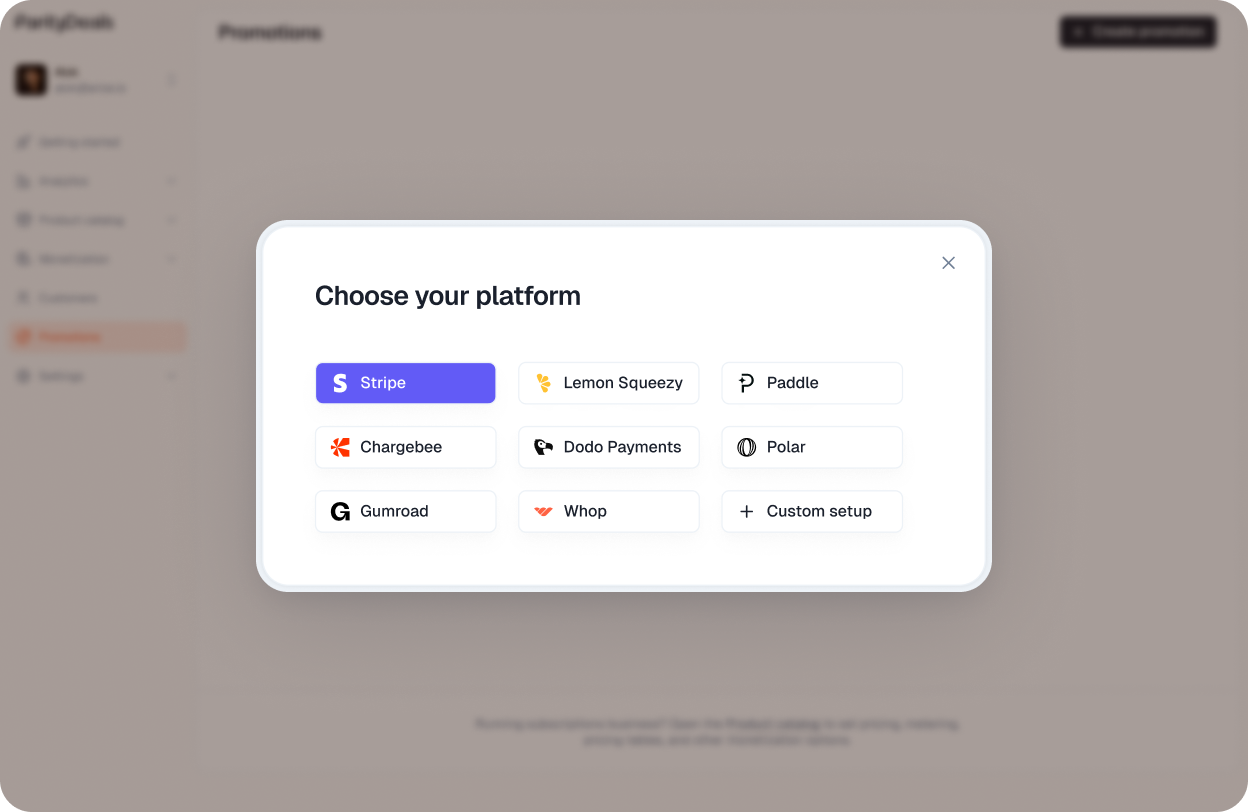
STEP 2
Create promotions
Start adding your product by selecting Stripe from the ‘Create promotions’.
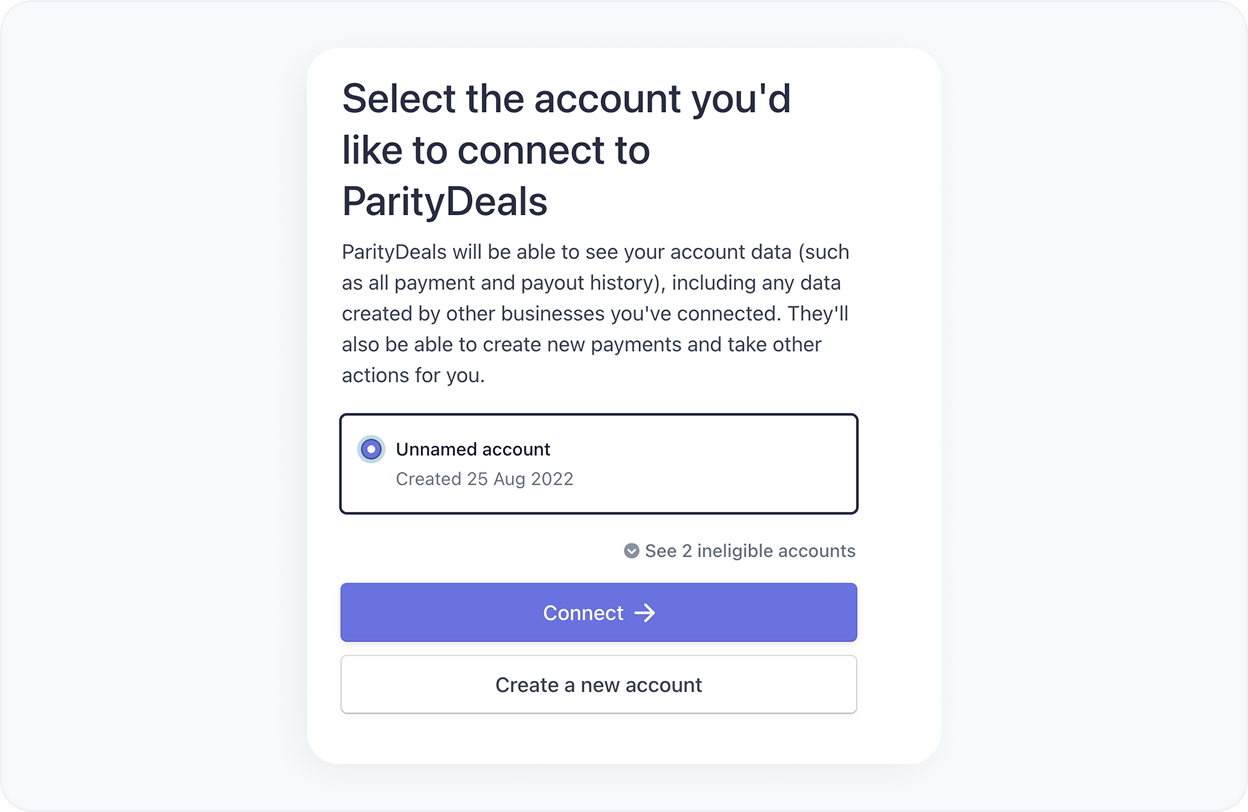
STEP 3
Authorize ParityDeals to use your Stripe account
Authorize ParityDeals to allow access of all your products for seamless experience.
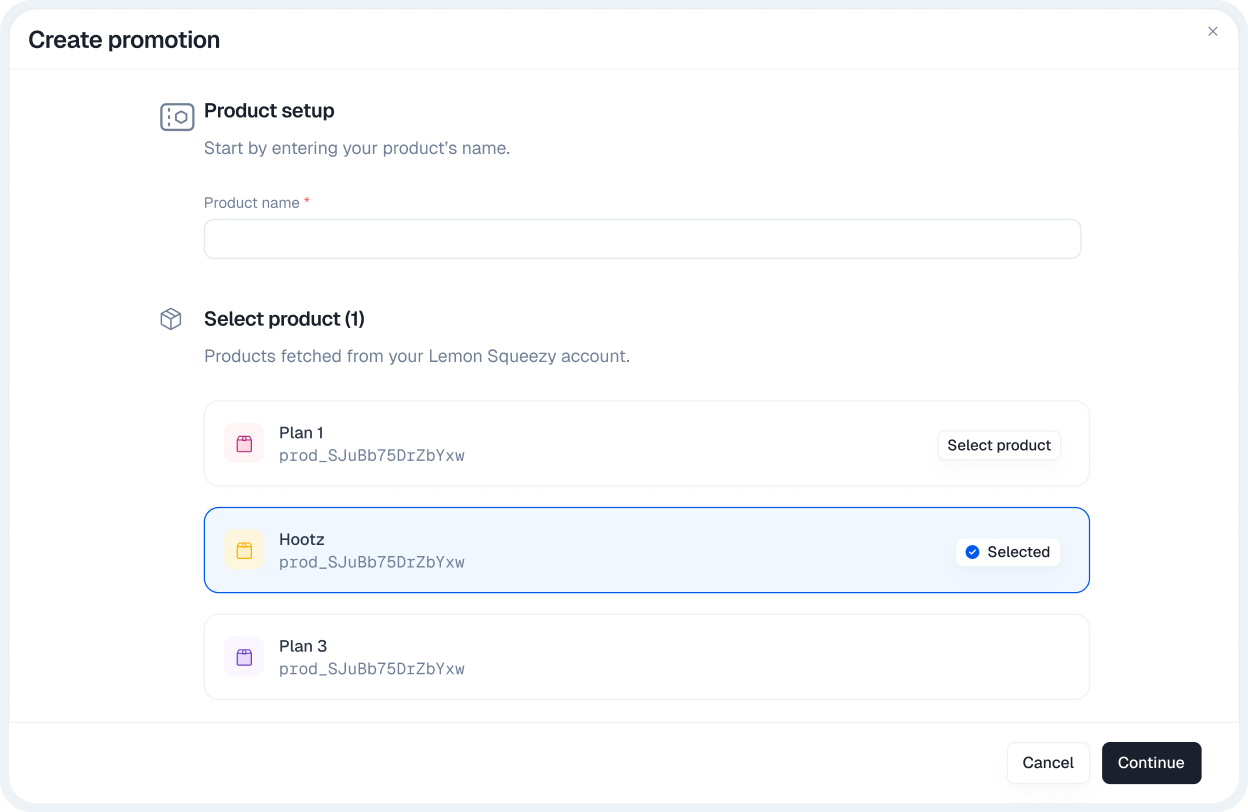
STEP 4
Select products
Choose the products that you want to set the geographical pricing for. If you choose multiple products, we'll create the same coupon codes for all the selected products.
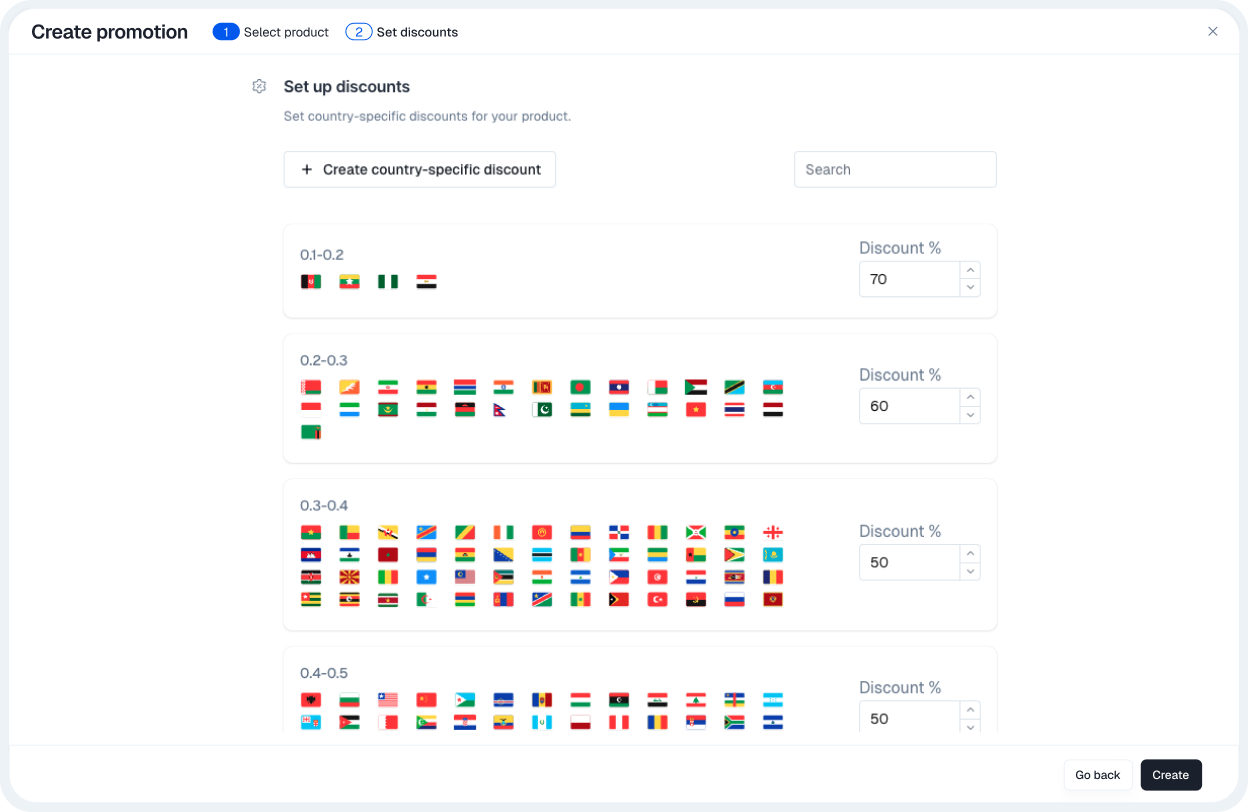
STEP 5
Verify pricing rules
Verify the discount percentage for each country group. You need to create coupon codes on your Beehiiv account and add them here.
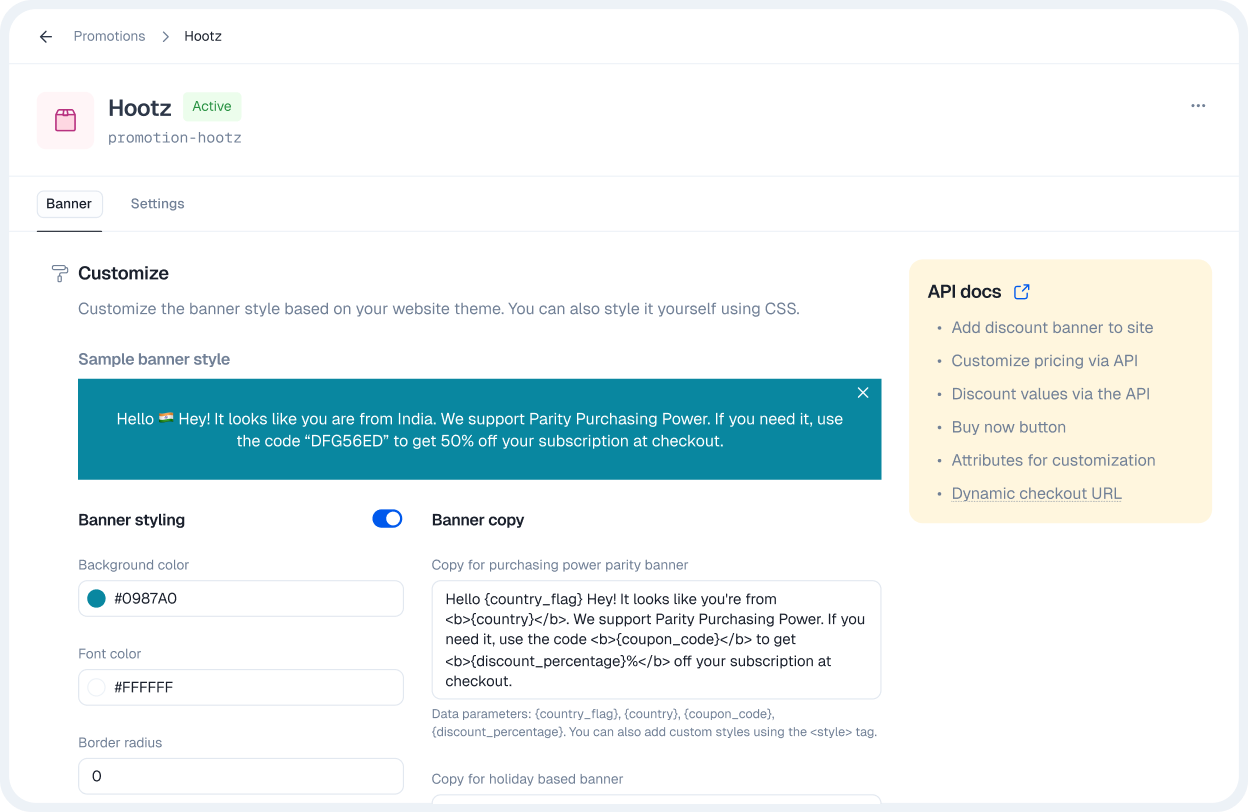
STEP 6
Customize your banner
Now configure the banner that will be added to your site. You could adjust the text, design, and placement of the banner as per your website theme.
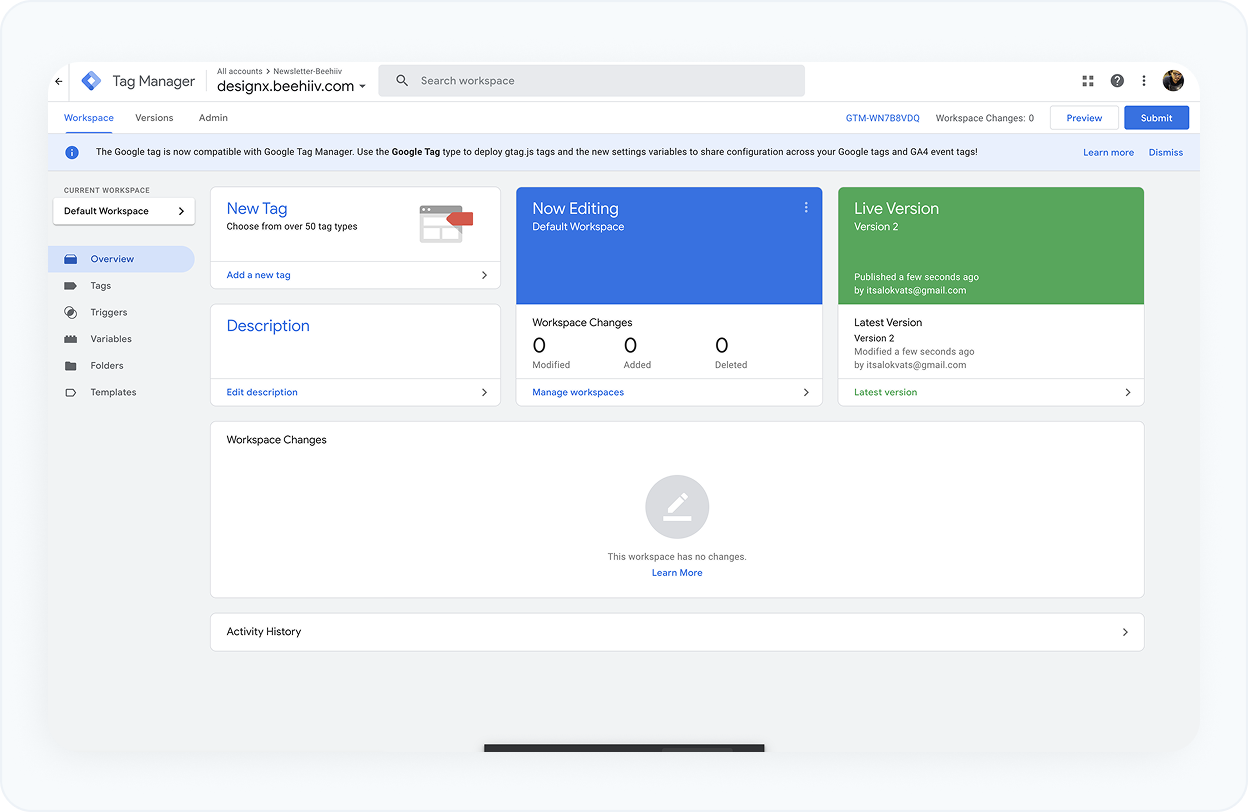
STEP 7
Create Google tag manager ID
Currently, Beehiiv does not support the direct addition of script tags to its pages. However, you can still add them indirectly using Google Tag Manager. Here’s how: To create a new account, visit https://tagmanager.google.com/. Alternatively, you can use your existing Tag Manager account.

STEP 8
Add a new tag for your Beehiiv newsletter
In the 'New Tag' section, click on 'Add a new tag' and create a new tag for your newsletter.
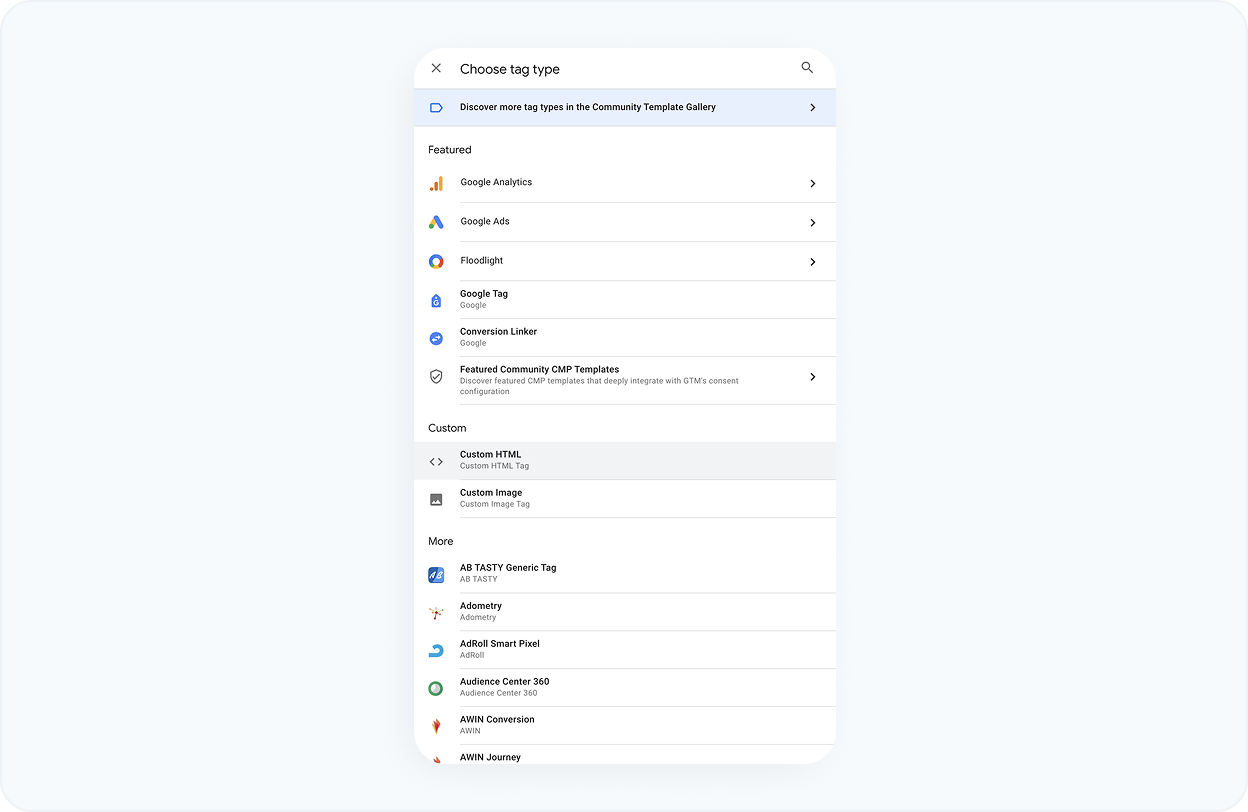
STEP 9
Choose the custom HTML option
Choose the 'Custom HTML' option from the custom list to generate the Google tag.
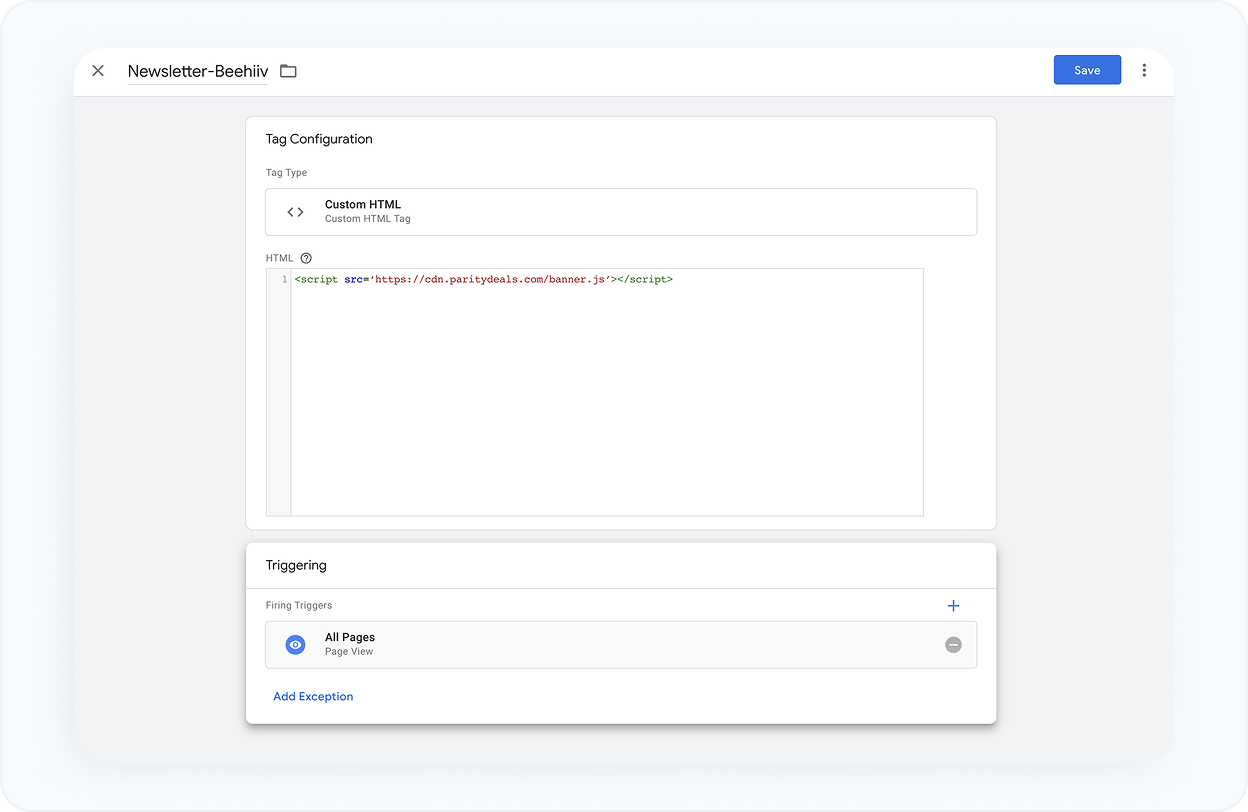
STEP 10
Add the ParityDeals script to your Google Tag manager
Add the following script tag to the HTML config section
<script
src='https://cdn.paritydeals.com/banner.js'></script>
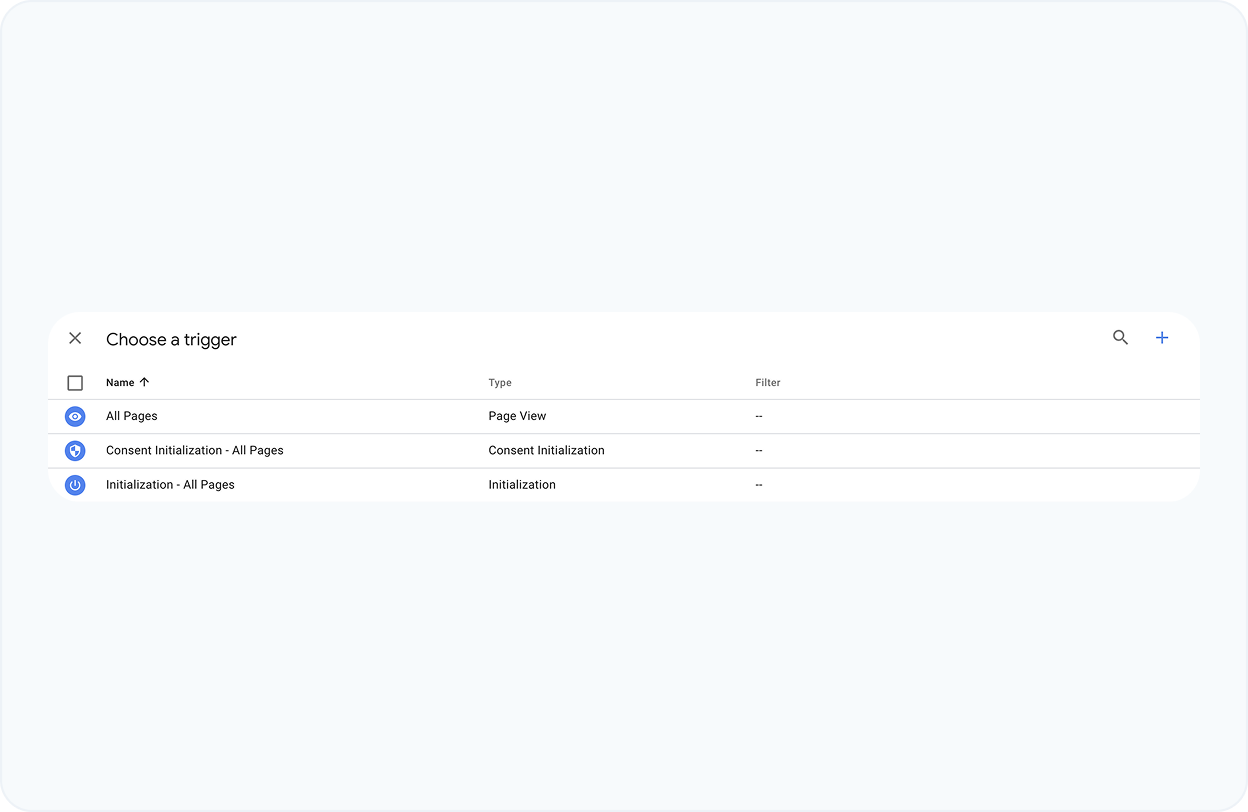
STEP 11
Choose a trigger
Select the 'All Pages' trigger option so that the tag gets triggered on each newsletter page.
STEP 12
Save Tag manager configuration
Save your Tag Manager settings with a name and description.
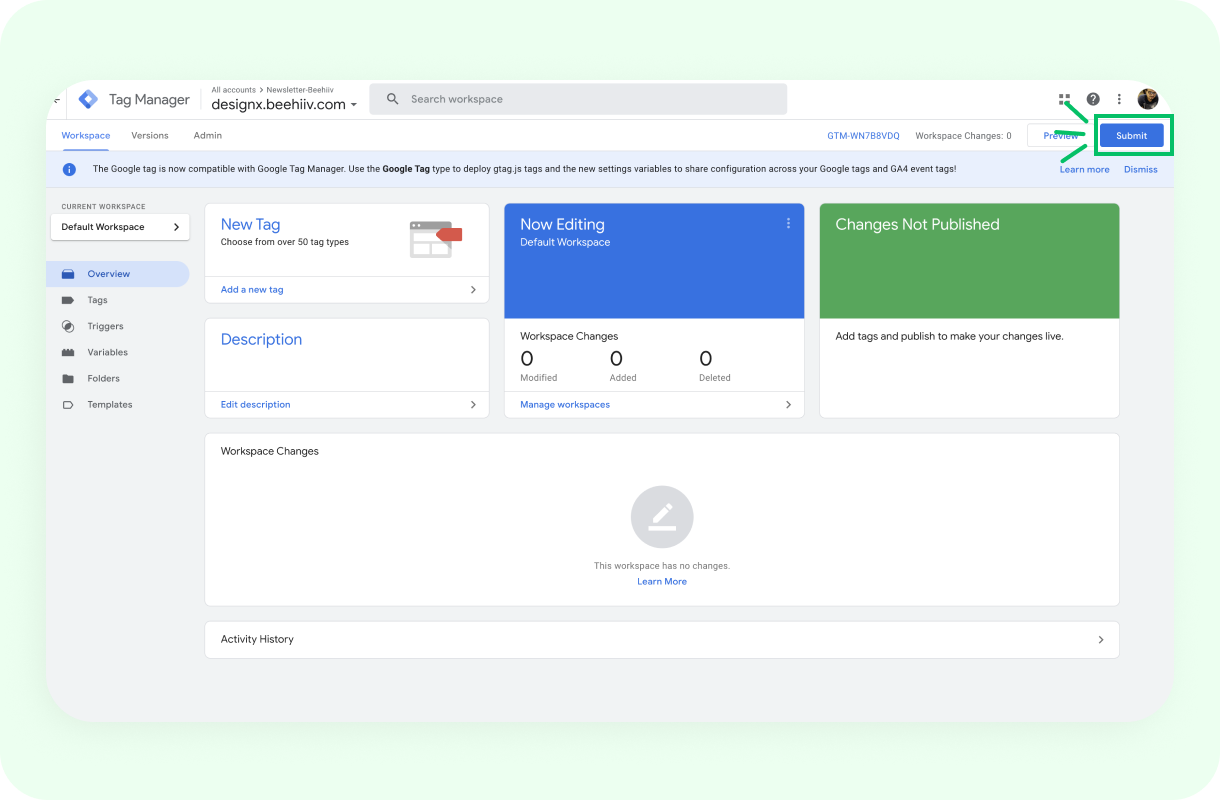
STEP 13
Submit Tag manager
From the top navigation section, submit your Google Tag.
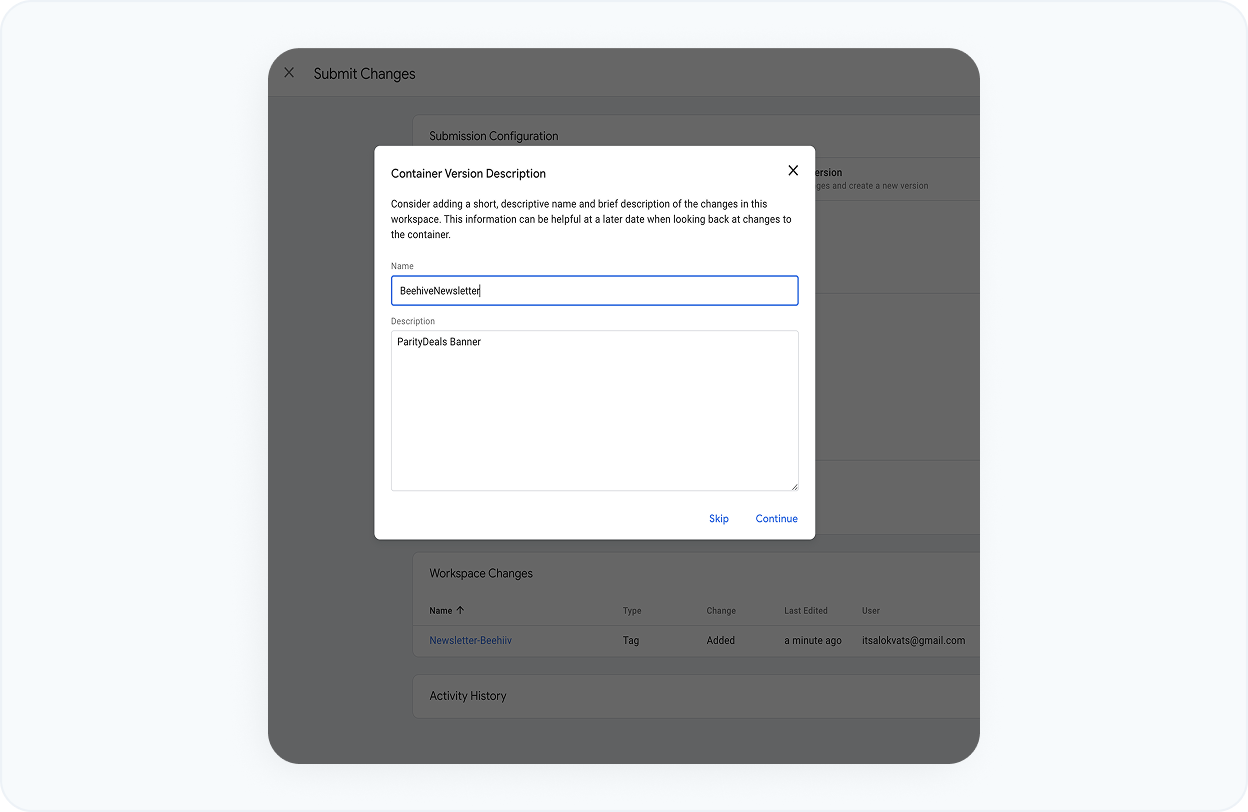
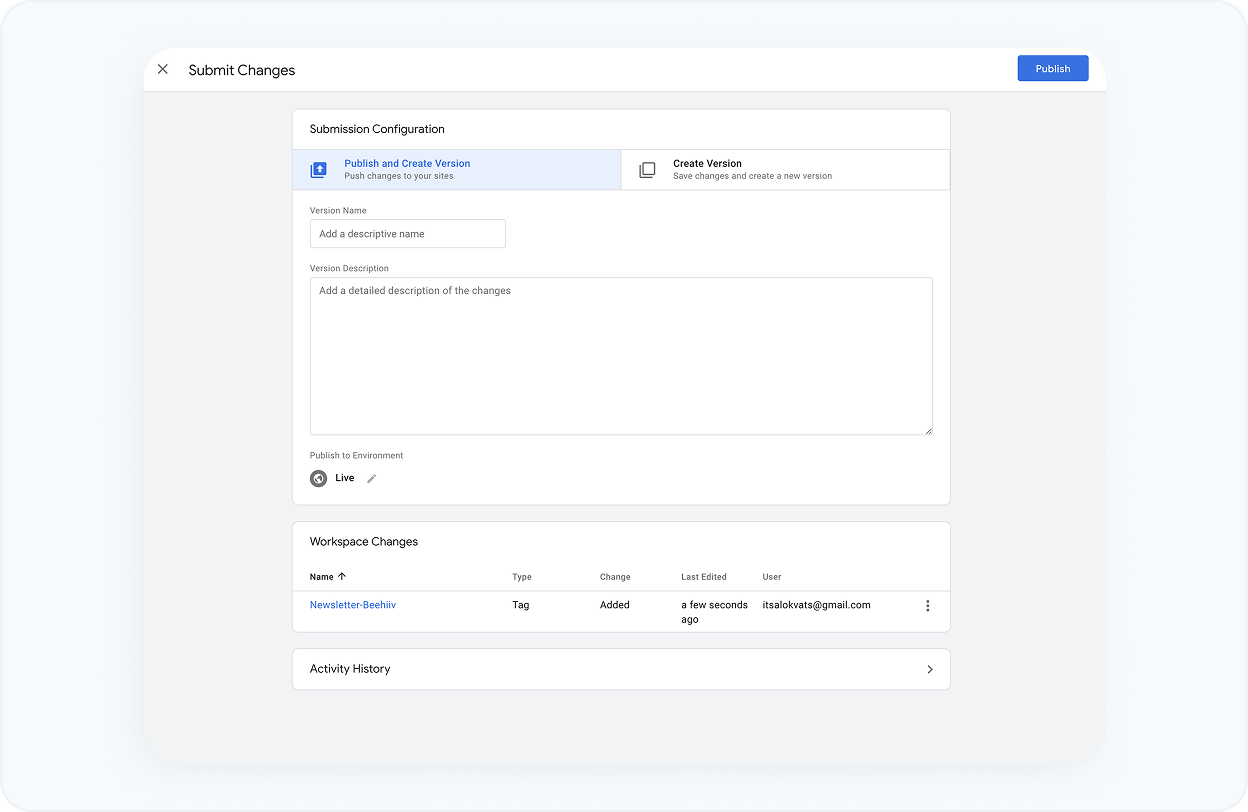
STEP 14
Provide a version name publish the Tag
Every time you save a tag, you need to provide the version name and description. This could be anything, like "Tag Version 1," etc. After that, you can click the Publish button located in the top right corner of the modal.
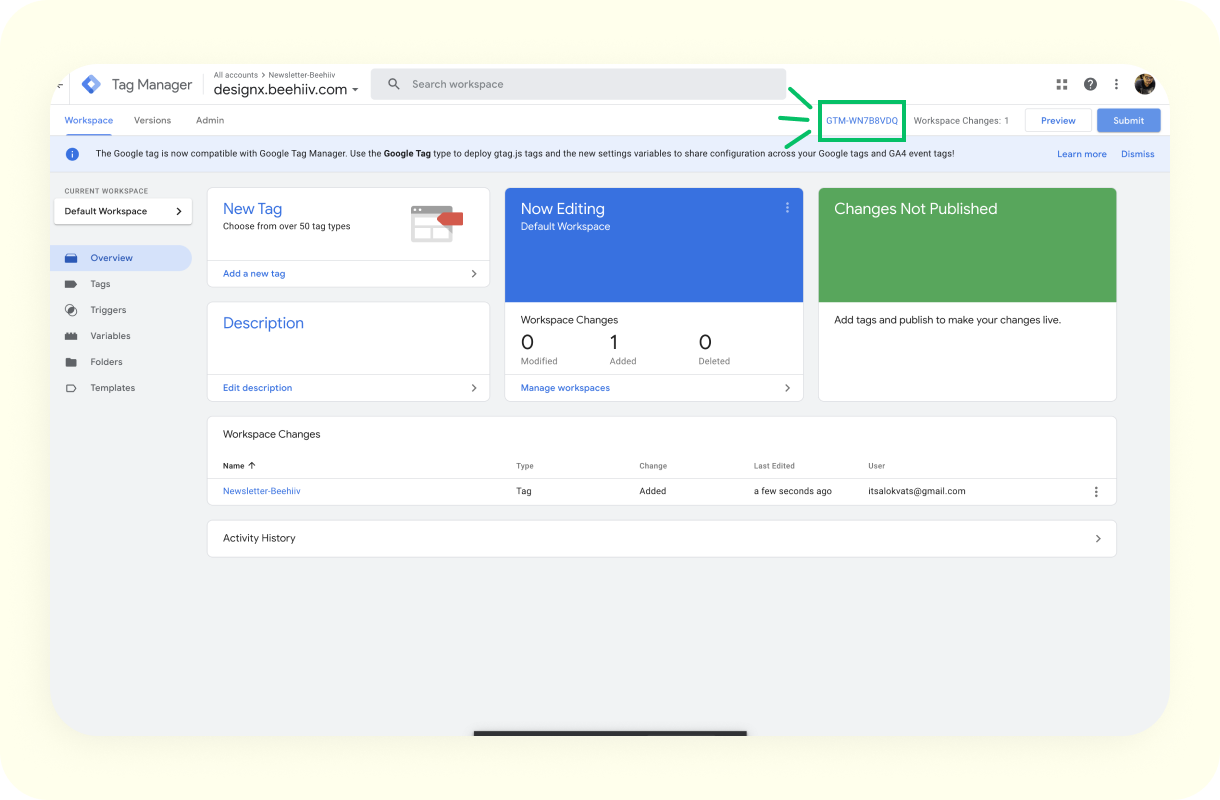
STEP 15
Copy the Tag ID
After successfully creating the tag, we need to copy the tag ID from the top bar
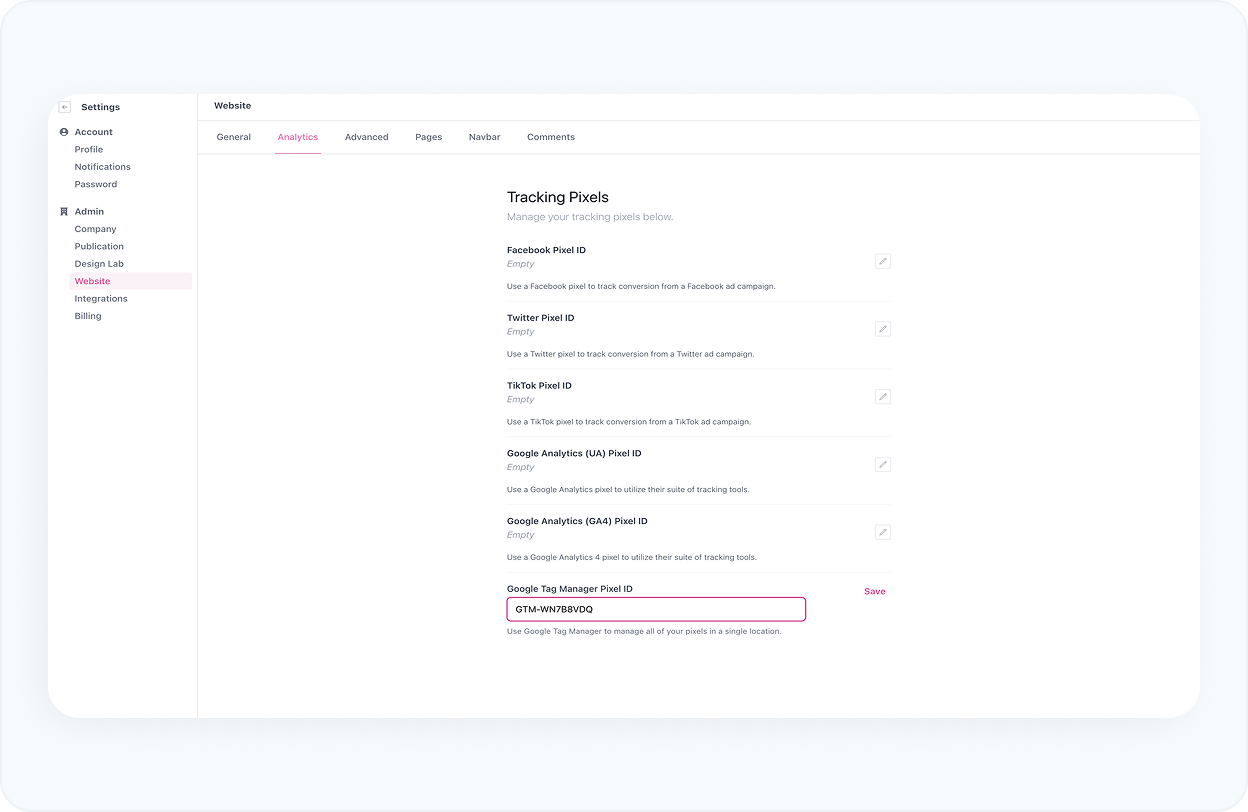
STEP 16
Configure the ID in the Beehiiv Google Tag Manager field
Go to Settings > Website > Analytics and paste the tag ID and save it.
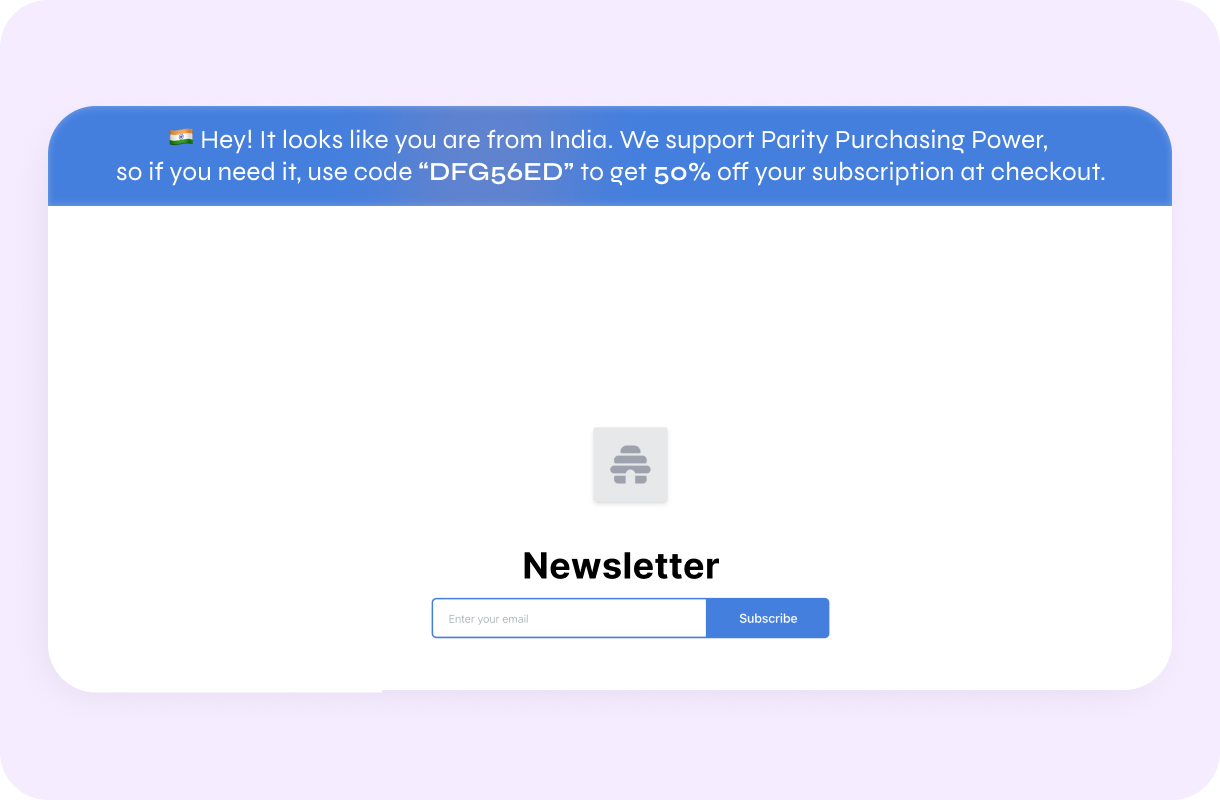
STEP 17
Banner preview
Now, targeted customers from different countries will see a banner on your page. The
banner includes a discount code that corresponds to their location, enabling them to
enjoy a reduced price at checkout.
To test the banner, add a temporary discount coupon for your own country. Please
note that the usage of VPN is detected and prevented from displaying coupons.